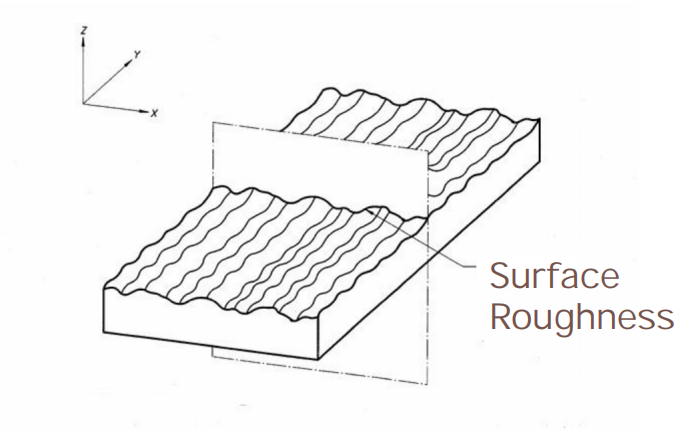
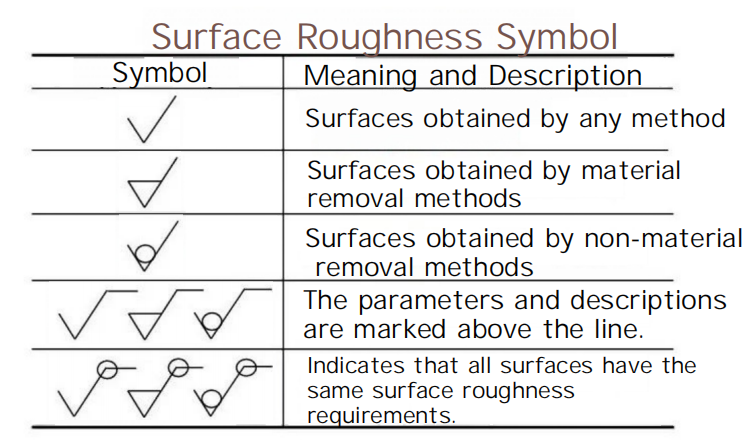
Surface Roughness Symbol
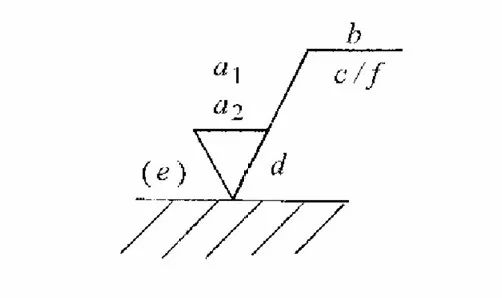
a?、a?— symbols and values for the roughness height
parameters (unit is μm);
b — machining requirements, plating, coating, surface treatment, or other descriptions;
c — sampling length (in millimeters) or waviness (in micrometers);
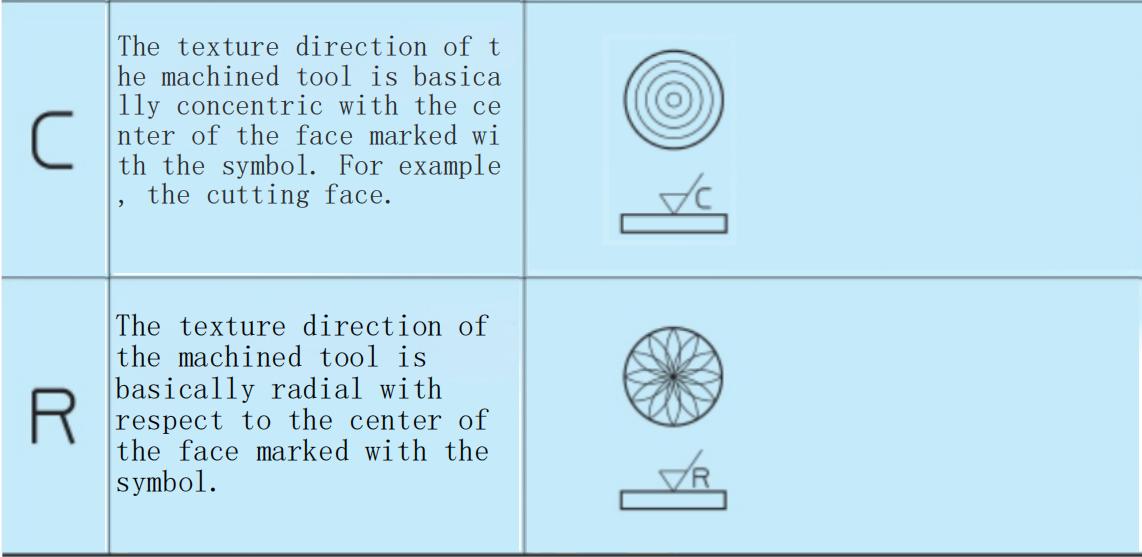
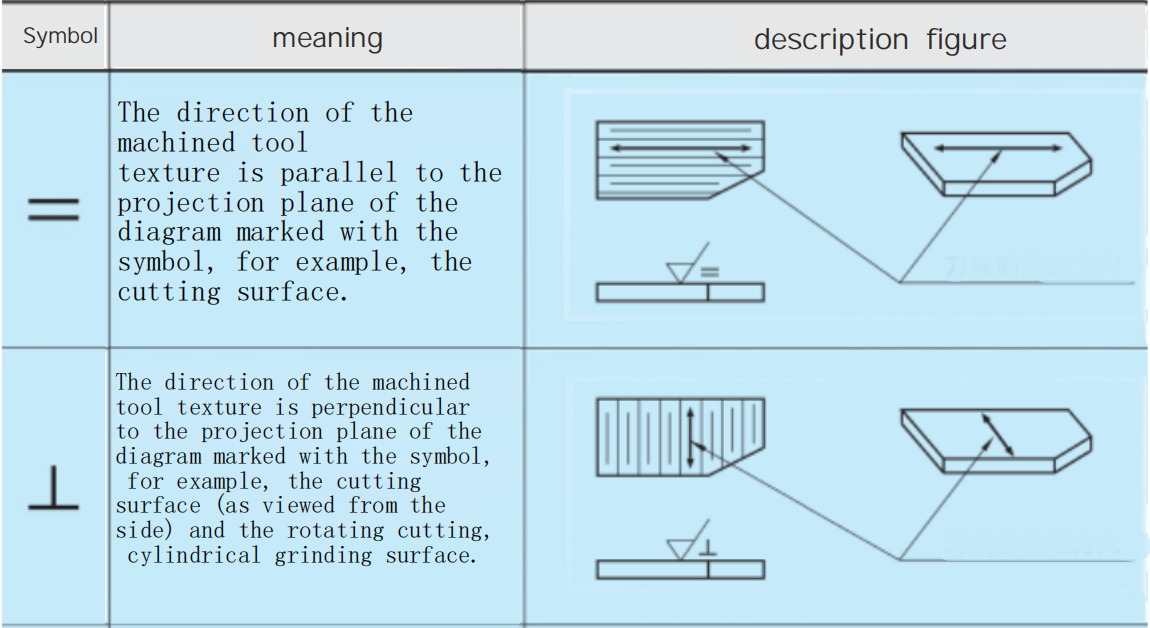
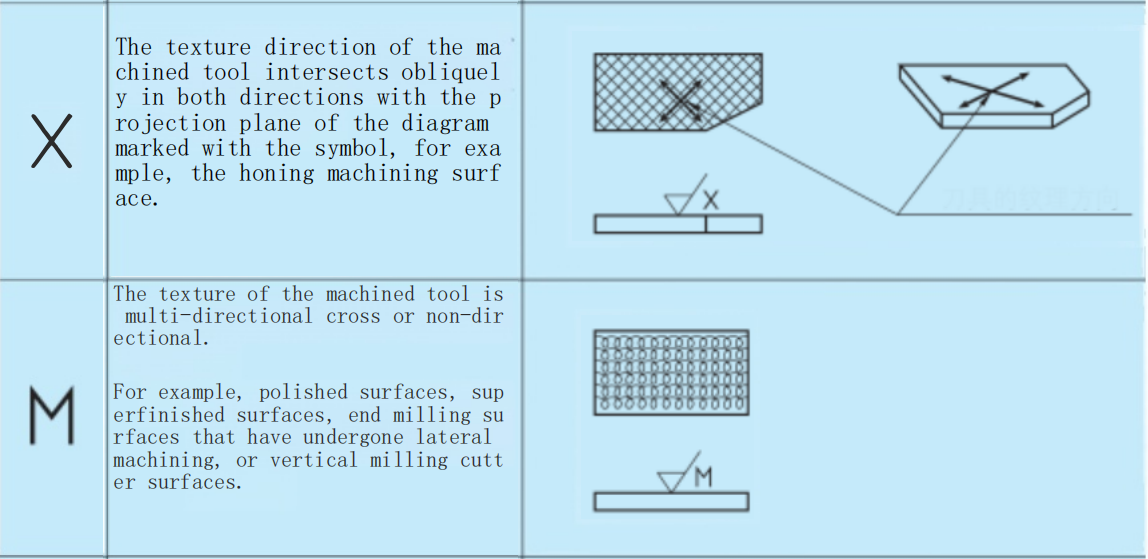
d — symbol for the direction of the machining texture;
e — machining allowance (in millimeters);
f — roughness spacing parameter (in millimeters) or profile support length ratio.
?Other Annotation Descriptions
- Sampling Length: The length range selected when measuring roughness, used to calculate roughness parameters.
- Evaluation Length: The total sum of the sampling lengths, used to assess surface roughness.
- Machining Method: Indicates the machining method by which the surface roughness is achieved, such as turning, grinding, etc.
- Other Requirements: For example, surface treatment (such as sandblasting, polishing, etc.), texture direction, etc.
Roughness Code
Arithmetic Mean Roughness Ra
Arithmetic mean roughness is the most commonly used roughness parameter, representing the arithmetic average of the absolute values of the profile peaks and valleys within the sampling length. When selecting the reference length in the direction of the mean line from the roughness curve, using the direction of the mean line of the selected part as the X-axis and the direction of the vertical magnification as the Y-axis, if the roughness curve is represented as y=f(x), the value obtained from the following formula, when expressed in micrometers (μm), is called the arithmetic mean roughness Ra.
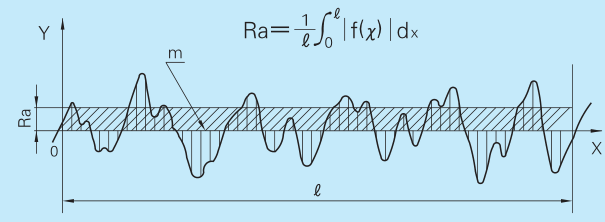
Arithmetic Mean Roughness Ra
Note: The arithmetic mean roughness Ra is the most commonly used expression for roughness. Unless otherwise specifically noted, roughness generally refers to Ra.
From the roughness curve, a reference length is selected in the direction of the mean line. From the values measured in the direction of the vertical magnification from the mean line of the selected part, the sum of the average absolute values of the peak elevations (Yp) from the highest peak to the fifth peak and the average absolute values of the valley elevations (Yv) from the lowest valley to the fifth valley is calculated. This sum is referred to as the value expressed in micrometers (μm).
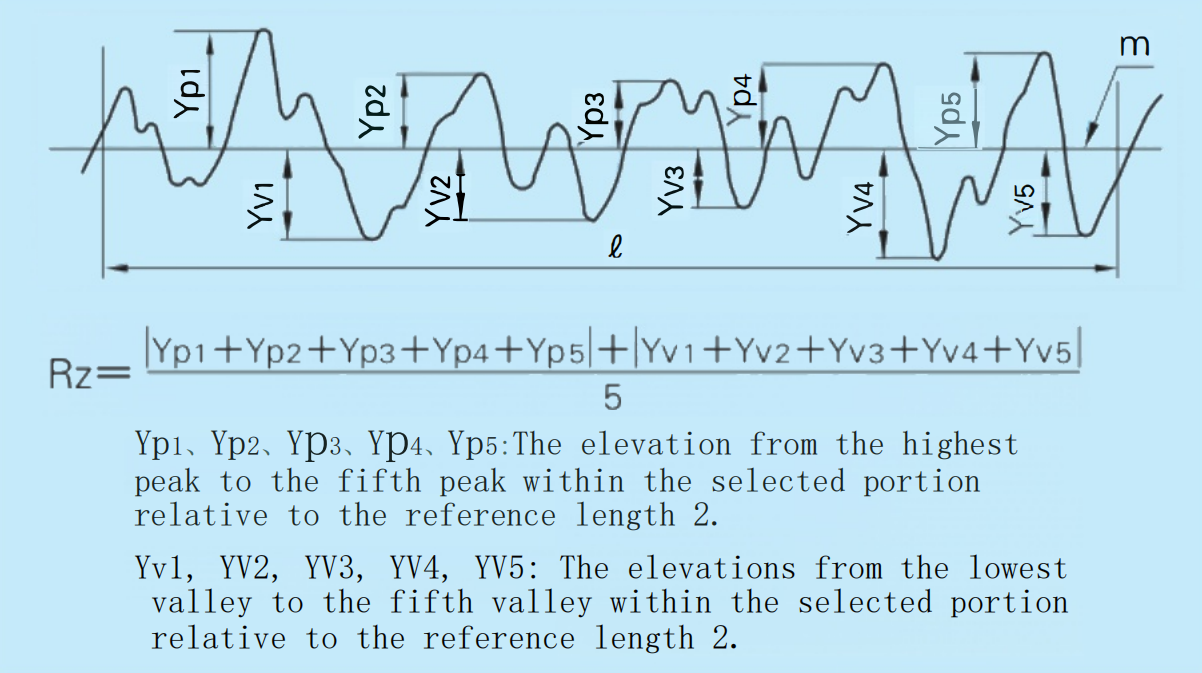
Maximum Height Ry
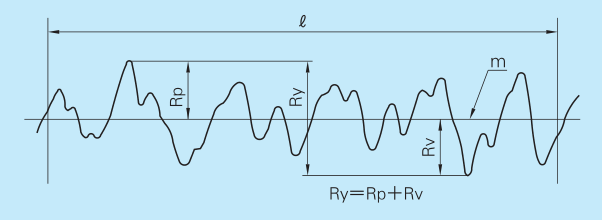
The maximum profile height, which represents the vertical distance between the highest profile peak and the deepest valley within the sampling length. From the roughness curve, a reference length is selected in the direction of the mean line. The interval between the peak line and the valley line of the selected part is measured in the direction of the vertical magnification of the roughness curve, and this value is called the micrometer value (μm).
Note: When determining Ry, the reference length should be selected from a section of the curve that is free of cracks and extreme peaks and valleys.
Labeling Example
Label the upper limit value of Ra
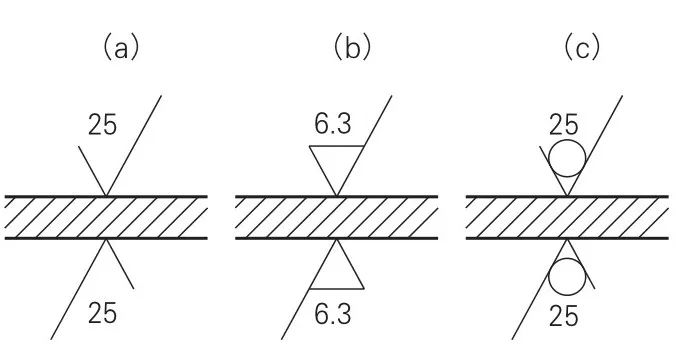
- Control the surface roughness to within 25μm by any means.
- Control the surface roughness to within 6.3μm by material removal methods.
- Control the surface roughness to within 25μm without removing material.
Label the direction of the machining texture
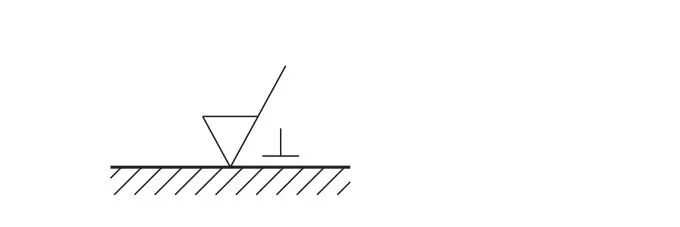
Note: The direction of the machined tool texture is perpendicular to the projection plane marked with symbols.
Label the upper and lower limits of Ra
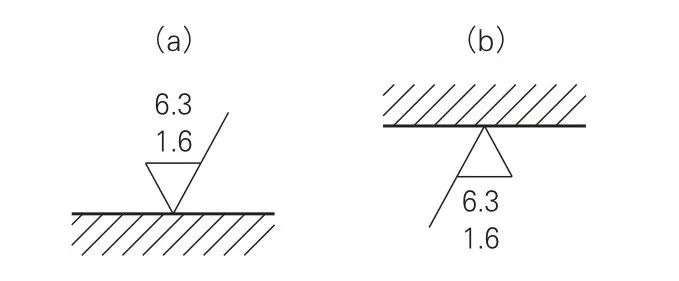
Control the surface roughness to a minimum of 1.6μm and a maximum of 6.3μm by removing material. Generally, the upper and lower limit values are marked for oil seal installation holes, as roughness that is too large or too small can affect the sealing effect of the oil seal.
Label the machining method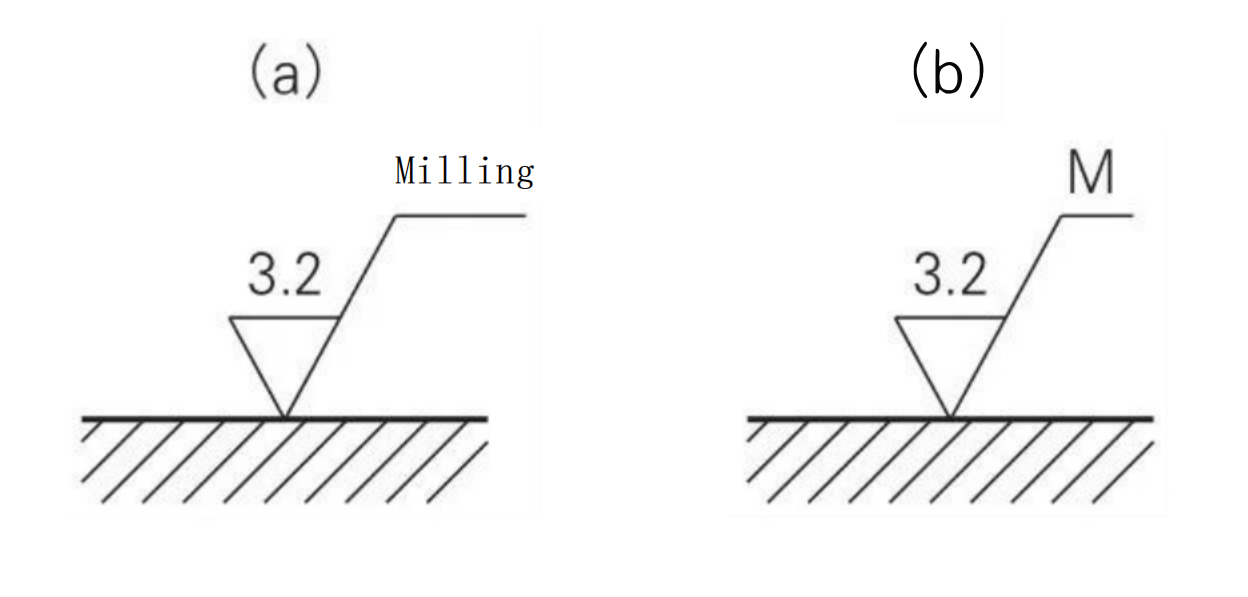
Marking Machining Method
Attention Points Marking Position: The roughness symbol is usually annotated above or below the dimension line, close to the surface being marked.
Direction Guide Line: The direction guide line should point towards the surface being marked and be parallel or perpendicular to the surface.
Value Unit: The roughness values are typically expressed in micrometers (μm).


