As a precision measuring tool, micrometer (also known as screw micrometer) is widely used in precision machining. It is well known by people in the industry. However, the measured value is not an absolute value. Only when the measuring tool is used correctly can it approach its accurate value infinitely.
The first step in using the micrometer correctly:
Micrometer can be divided into digital display type, mechanical type (non digital display), waterproof and oil proof type, general type, special type, large-scale, rapid measurement type, ultra-high precision type, etc. before use, it is necessary to carefully confirm the type, measurement range, accuracy or other specifications.
Reading scale correctly
In the use of mechanical micrometers (non digital display type), there are often errors in reading, which affect the accuracy of measurement. It is very important to master the reading mode of scale and improve the accuracy of reading.
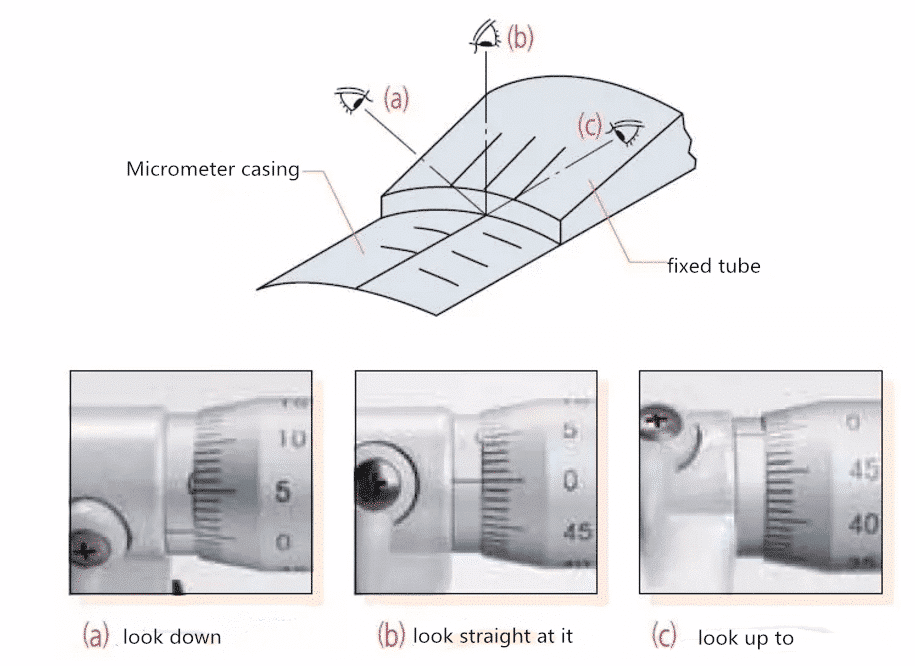
When reading the reticle of the differential cylinder, the correct posture is to look directly at the reference line. As shown in the following example:
Reading the scale of standard micrometer
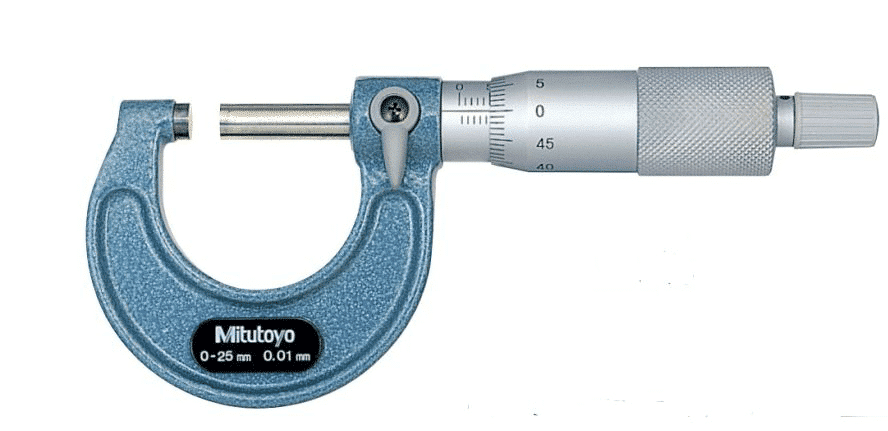
Standard micrometer:

In general, the division value 0.01mm can be read as shown in the figure above, or 0.001mm can be read as shown in the figure below.
Scale reading with vernier micrometer
With cursor (index value 0.001mm):

Micrometer with vernier refers to the vernier scale on the base line of casing.
Note: when the leader is between two scales (as shown in positions ②, 21 and 22), it is read as 0.21mm.
When the stroke scale is aligned with one of the micro scales (as shown in Fig. position ③), the reading is 0.003 mm.
Effect of temperature
Before measurement, in order to avoid the influence of temperature, the micrometer and the workpiece to be measured shall be placed at room temperature for a long enough time to make its temperature balanced.
However, in the process of using micrometer, the influence of hand temperature on micrometer is often ignored.
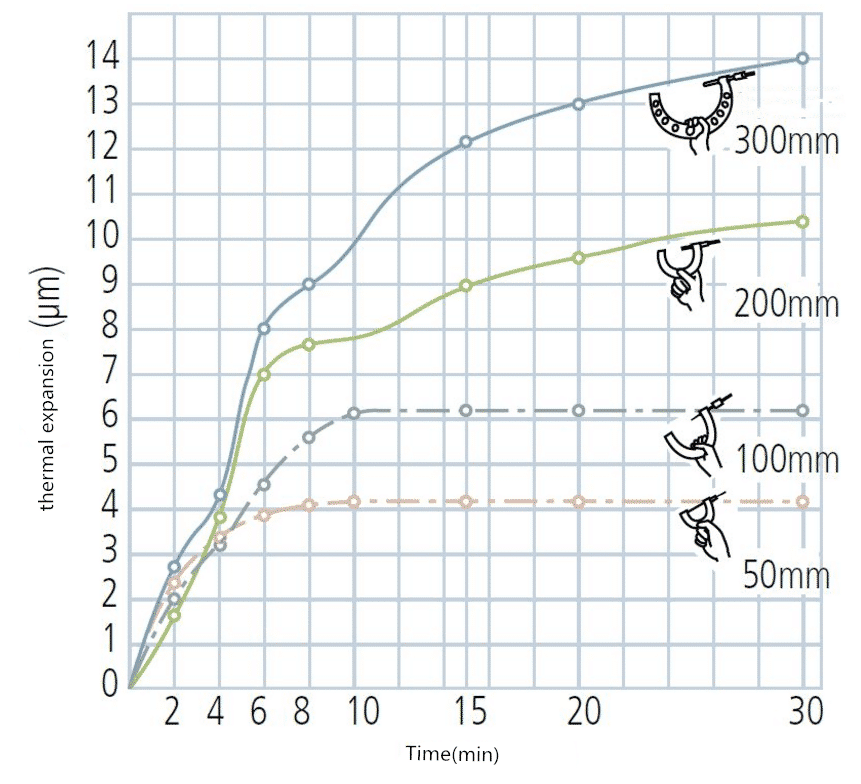
When measuring with a micrometer, the heat of the hand will be transferred to the measuring tool when the hand is holding the micrometer frame, resulting in obvious measurement error (as shown in the following experimental results).
As shown in the figure above, the thermal expansion value of the micrometer increases with the holding time.
Thus,
① If the micrometer must be held during measurement, the contact time shall be minimized.
② To reduce the above temperature effects, you can also choose to install a thermal insulator or wear a pair of gloves.
③ Special micrometer stand can be selected.
The influence of support platform
When using the bench, the choice of fulcrum position and the posture of micrometer have different effects on the measurement results. As shown in the chart below. Therefore, after determining the measurement pose, it is necessary to align the base point for reuse.
Other general precautions
The starting point (zero) should be adjusted before measuring, and zero position should be used before using the non fuzzed paper to wipe the measuring surface of the anvil and the micro screw.
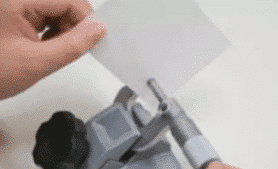
As part of daily maintenance, wipe off any dust, debris and other debris around the environment and on the measuring surface. In addition, carefully wipe any stains and fingerprints with a dry cloth.
Use the force measuring device correctly, so as to measure under the correct force. Note: when the measuring surface contacts the workpiece and the subsequent measurement, the force measuring device must be used to prevent the workpiece from being impacted rapidly.
When the micrometer is installed on the micrometer stand, the stand shall be fixed and clamped in the center of the micrometer frame. But don’t clamp it too tightly.
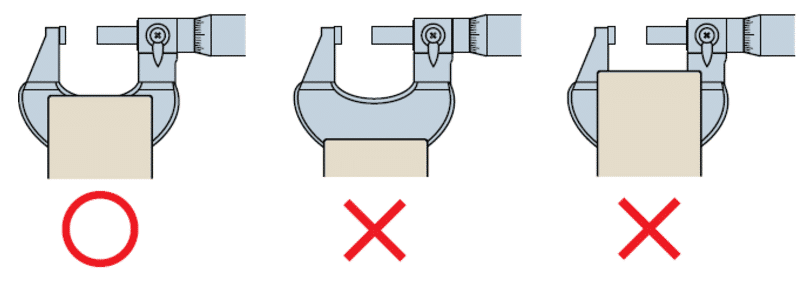
Take care that the micrometer does not fall or collide with anything. Do not use excessive force to rotate the micrometer micro screw. If it is felt that the micrometer may have been damaged due to accidental misoperation, its accuracy needs to be further checked before use.
After a long period of storage or protective oil film, wipe the micrometer gently with a cloth soaked in anti-corrosion oil.
Precautions for storage
△ avoid direct sunlight during storage.
△ store in a place with good ventilation and low humidity.
Store in a place free of dust.
△ if it is stored in a box or other container, the box or container cannot be placed on the ground.
△ during storage, there should be a gap of 0.1mm to 1mm between the measuring surfaces.
△ do not store the micrometer in the clamped state.


